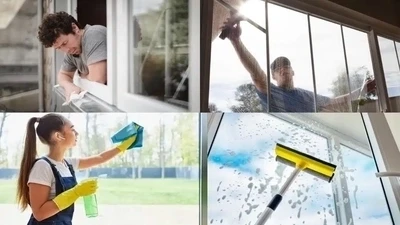
Window cleaning is an essential aspect of home maintenance that often gets overlooked. Clean windows not only enhance your home's curb appeal but also allow natural light to shine through, creating a warm and inviting atmosphere inside. However, knowing when to clean your windows, what supplies to use, and the most effective techniques can sometimes be overwhelming. In this comprehensive checklist, we will guide you through everything you need to know about window cleaning to ensure you achieve sparkling results without the stress.
Before diving into the specifics, it’s vital to understand why window cleaning is necessary.
Clean windows significantly improve the appearance of your home, giving it a well-maintained and welcoming look. Smudged or dirty windows can detract from the beauty of your property and create an impression of neglect.
Windows are a primary source of natural light in the home. When they are dirty, they can block sunlight, making your living spaces feel darker and less inviting.
Clean windows contribute to energy efficiency by allowing sunlight to warm your home naturally during colder months. Dirty windows can impede this process, causing you to rely more on heating and increasing energy bills.
Regular cleaning helps protect windows from damage caused by dirt, grime, and hard water stains. Neglecting this maintenance can lead to costly repairs or replacements.
Windows can accumulate dust, allergens, and pollutants that affect indoor air quality. Regular cleaning helps keep these particles at bay, promoting a healthier home environment.

Establishing a cleaning schedule is crucial for keeping your windows in top condition. Here are some guidelines for when to clean your windows:
Conduct a thorough cleaning of your windows at least once a season. This frequency ensures that environmental factors such as pollen in spring, dust in summer, and grime from rainy weather are managed effectively.
For homes in urban areas or those with heavy pollution, consider doing a quick cleaning every month. This helps remove any built-up dirt or smudges before they become more challenging to clean.
After a significant storm, it is beneficial to inspect and clean your windows. Heavy rain, wind, and debris can lead to dirt accumulation that may require immediate attention.
If you are preparing for a family gathering or special event, cleaning your windows in advance can enhance your home's appearance and make a positive impression on guests.
Preparation is key to a successful window cleaning experience. Use the following checklist to make sure you’re ready:
Collect all the necessary tools and cleaning solutions before starting:
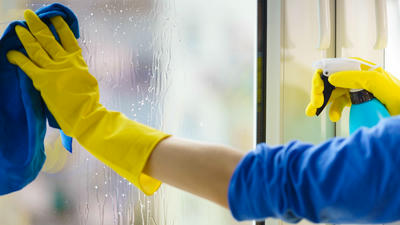
Ensure you are equipped with safety gear:
Pick a day that is suitable for cleaning windows:
Consider the sequence in which you will clean your windows. Start with those that are easier and accessible, gradually working your way to higher or more challenging windows.

Follow these steps for a thorough and effective window cleaning experience:
Before applying any cleaning solution, use a dry microfiber cloth or duster to remove loose dust and cobwebs from the window sills, frames, and glass surface. This preparation prevents dirt from mixing with the cleaning solution during washing.
Depending on your preference, you can choose from various cleaning solutions:
Homemade Solution:
Commercial Cleaners:
This step is crucial for achieving that desired streak-free finish.
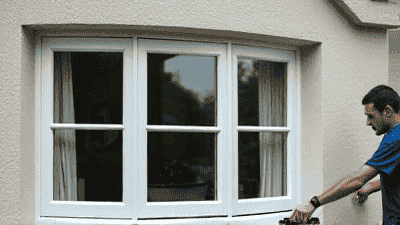
When cleaning high windows, additional precautions are necessary to ensure safety:
For windows that are difficult to reach, consider using a squeegee with an extension pole. This allows you to clean without climbing a ladder.
If using a ladder, make sure it is steady and placed on a flat surface. Always maintain three points of contact while climbing.
If possible, have someone assist you by holding the ladder or passing tools as needed. They can also ensure you are safe while you work at heights.
If you feel uncomfortable cleaning high windows or your windows are particularly difficult to access, consider hiring a professional window cleaning service. They have the experience and equipment to safely clean high and hard-to-reach windows.

Even with the best planning, you might encounter some issues while cleaning your windows. Here are some common problems and how to address them:
If you notice streaks after cleaning, consider the following remedies:
For stubborn stains or hard water deposits, try these methods:
Prevent dirt and grime from accumulating on your windows by following these tips:
To prolong the cleanliness of your windows between professional cleanings or thorough cleanings, consider the following maintenance tips:
Keep a spray bottle of your cleaning solution handy for quick touch-ups. Address smudges and fingerprints as they occur to prevent dirty buildup.
Periodically inspect your windows for signs of damage, dirt buildup, or hard water stains. Early detection can make subsequent cleanings easier.
Consider trimming nearby trees or shrubs to reduce debris that can accumulate on your windows. A well-kept landscape can minimize the need for frequent cleaning.
If you are environmentally conscious, many eco-friendly cleaning options can keep your windows sparkling while being safe for both your family and the planet.
As mentioned earlier, a simple mixture of vinegar and water is an excellent natural cleaner. It’s effective, non-toxic, and safe for the environment.
Using baking soda mixed with water creates a gentle abrasive that can help remove tough stains without harsh chemicals.
Cornstarch can also serve as a natural window cleaner. Mix it with a cup of water and white vinegar to create an effective glass-cleaning solution.
For those who enjoy a pleasant scent, adding a few drops of essential oil like lemon or lavender to your cleaning solution can make the process more enjoyable without compromising effectiveness.
Cleaning your windows doesn't have to be a daunting chore. Armed with this comprehensive checklist and a little preparation, you can achieve sparkling results in no time. Regular maintenance will improve your home's appearance, enhance natural light, and prolong the life of your windows.
By understanding the importance of window cleaning, knowing when and how to clean, and utilizing the right tools and techniques, you will ensure that your windows stay in top condition year-round. Whether you tackle the job yourself or enlist the help of professionals, the satisfaction of having crystal-clear windows will be well worth the effort.
Happy cleaning, and may your windows always shine bright!